Key Takeaways
-
Task logic is a powerful feature in the Weever Process Builder that enables the creation of dynamic, conditional workflows.
-
Recognizing that manufacturing processes often vary based on the specific product being run or the equipment being used, task logic prevents process clutter by hiding or showing steps only when they are relevant.
-
The system operates using a "controlling field"—a specific data point that triggers a predefined rule.
-
When an operator enters a value that meets the logic's criteria (such as a temperature reading falling within a safe range), the system can automatically mark subsequent tasks as "Not Required".
-
Because Weever processes default to hiding non-required tasks, the workflow remains clean and focused, presenting only the necessary actions to the floor staff.
-
This flexibility ensures compliance while significantly reducing the potential for human error by removing unnecessary procedural guesswork
"How-To" Guide: Implementing Task Logic
- Identify the Trigger: Determine which field will act as the controlling field to initiate the logic (e.g., a "Yes/No" selection or a numeric value).
- Access the Logic Menu: In the Process Builder, find the task that contains your controlling field and click the "Add Rule" button in the task logic column.
- Define the Condition: Select the specific field and set the condition that must be met (e.g., "When Field X is marked Yes").
- Set the Action: Decide whether the affected task should be changed to "Required" or "Not Required".
- Select the Target: Choose which specific task in the process will be affected by this rule.
- Review and Test: Use the "View Rules" button to check your work. During testing, you can see hidden tasks by selecting "Show tasks that are not required" in the actions dropdown of an active process.
Step-by-Step Instructions
STEP 1
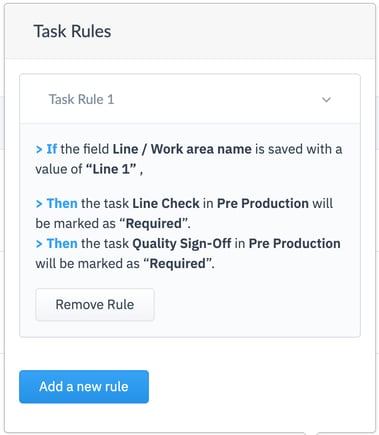
Determine a field in your form that will control if tasks are required or not required. In the example above, that field was the Line & Work Area field.
STEP 2
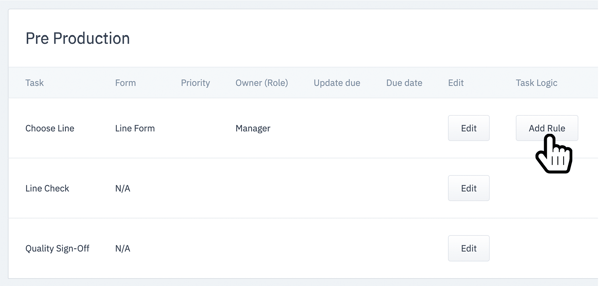
In Process Builder, choose Add Rule beside the task that contains the form that has the field that will control the tasks.
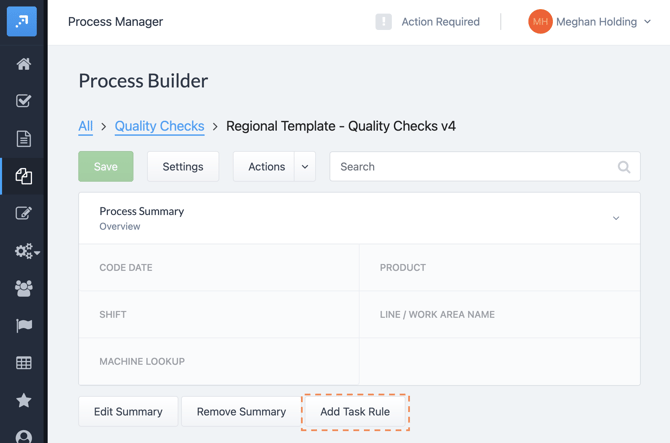
Tip! Add task rules to the summary form as well by tapping "Add Task Rule" below the summary form
STEP 3
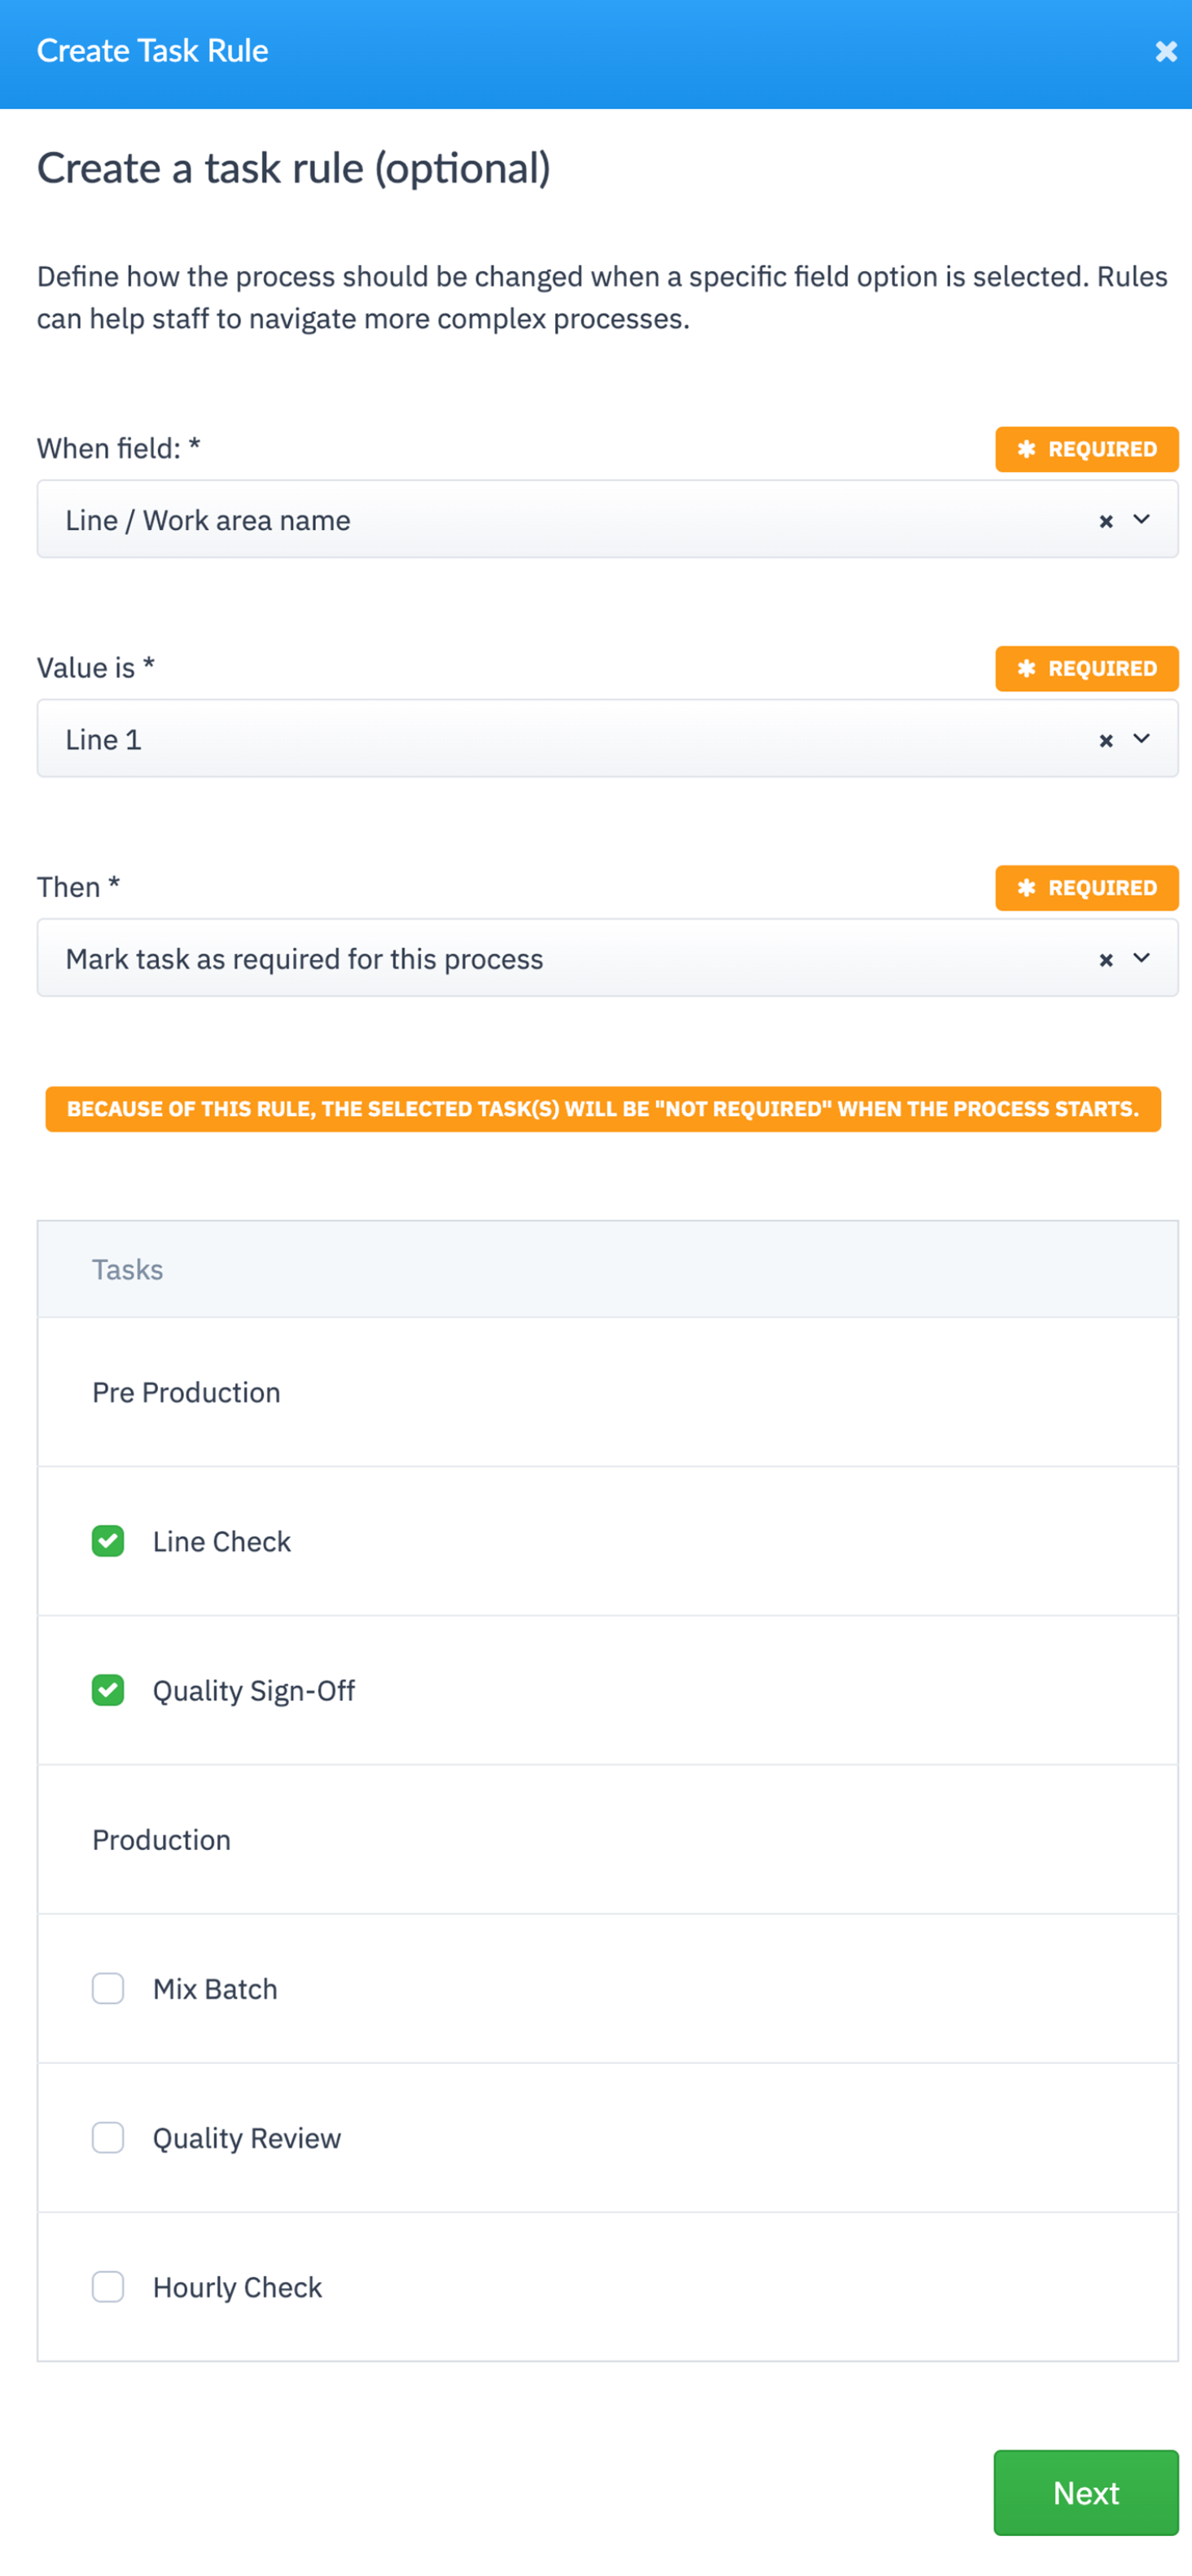
Create the task rule by selecting:
- The When field - the field in the form that will determine if the tasks are required or not required
- The Value Is field - the value of the When Field that will determine if the tasks are required or not required
- The Then field - if the tasks will be required or not required
- Tasks - the tasks that will be included in this rule
STEP 4
Tap Next and that's it! Now the Line Check and Quality Sign-Off tasks are required for Line 1.
TIP
You can review the task rule by tapping View Rule in Process Builder. This is where you can also add more rules or remove the task rules.